
Raglan Shaping an All Season Jacket
2February 1, 2015 by aswecrochet
The first project I’m covering on this blog is an all season jacket that S. requested. Here were his specifications:
- the most basic of basic stitches (I chose the single crochet stitch)
- tight tension
- a collar
- pockets
- all natural black yarn
I had a few requirements of my own:
- to not be dependent on a pattern
- for it to be top-down raglan shaping
Finally, the dimensions I’d be working with:
- collar: 2″
- front panel: 10″
- sleeve diameter: 7.5″
- back panel: 20″
S. wanted this to be the cardigan that was so repetitive, it gave me the thousand yarn stare. (see what I did there?) Challenge accepted.
I chose yarn from Naked Wool, based in the U.K. Link here: http://www.nakedwool.co.uk/wool-and-needles.html.
And I stitched up a swatch to have handy for starting the raglan shaping and also to obtain S.’s blessing.

Single stitch swatch of Naked Wool Bold Black DK
Next I had to actually plan out my raglan shaping. For the record, I really love the idea of top-down raglan shaping, I just didn’t know where to start. So I did some research. But the results Google was returning for raglan crochet were patterns that included raglan shaping, but didn’t explain the shaping. I didn’t want to depend so much on a pattern, but rather, wanted to learn how to do raglan shaping from start to finish so that I could modify my own cardigans, sweaters, and vests.
So I turned to knitting for some help and came across The Fringe Association’s tutorial on raglan shaping. Link here: http://fringeassociation.com/2013/03/08/how-to-improvise-a-top-down-sweater-part-1-casting-on-and-marking-raglans/ I found this tutorial to be immensely helpful. Translating the knitting into crochet, here were some takeaways:
- break my shaping into the parts I needed:
- front panel
- sleeve
- back
- sleeve
- front panel
- use stitch markers for the panels (in this case, four stitch markers)
- where to put the increases
- that I can start the raglan shaping with the collar
To start the collar, I used the foundation single stitch (search on the internet for a tutorial) and stitched 128, or until it measured 16″, which is the desired circumference that S. wanted. I then crocheted until the length was 2″, and made a button hole at 1″ length and four single stitches in from the edge, which was about 1/4″. The button hole itself was four single stitch spaces wide as I wanted to allow for the possibility of several different button sizes.

Look at that collar and button hole!
So far so good! The next challenge I found was knowing how to break apart the different sections. First I tried to go by Fringe’s method of keeping the sleeves no bigger than 30% of the garment, but that was confusing me too much. I ended up counting the total number of stitches and dividing that number by six, to get the five different sections (front, sleeve, back, sleeve, front). I realize that I said “six” to get “five sections.” I’m counting the back as two sections grouped into one.
After counting and dividing, I marked my stitches and decided that I would increase before and after the markers. I thought that this would give me greater control with my increases. I knew that the sleeves and the back would increase faster than the left or right front panels as they each received two increases versus the formers one increase per row. So my rationale was that if the sleeves reached their desired size of 7.5″, I could simply stop increasing in those areas and continue with the back and the front panels.
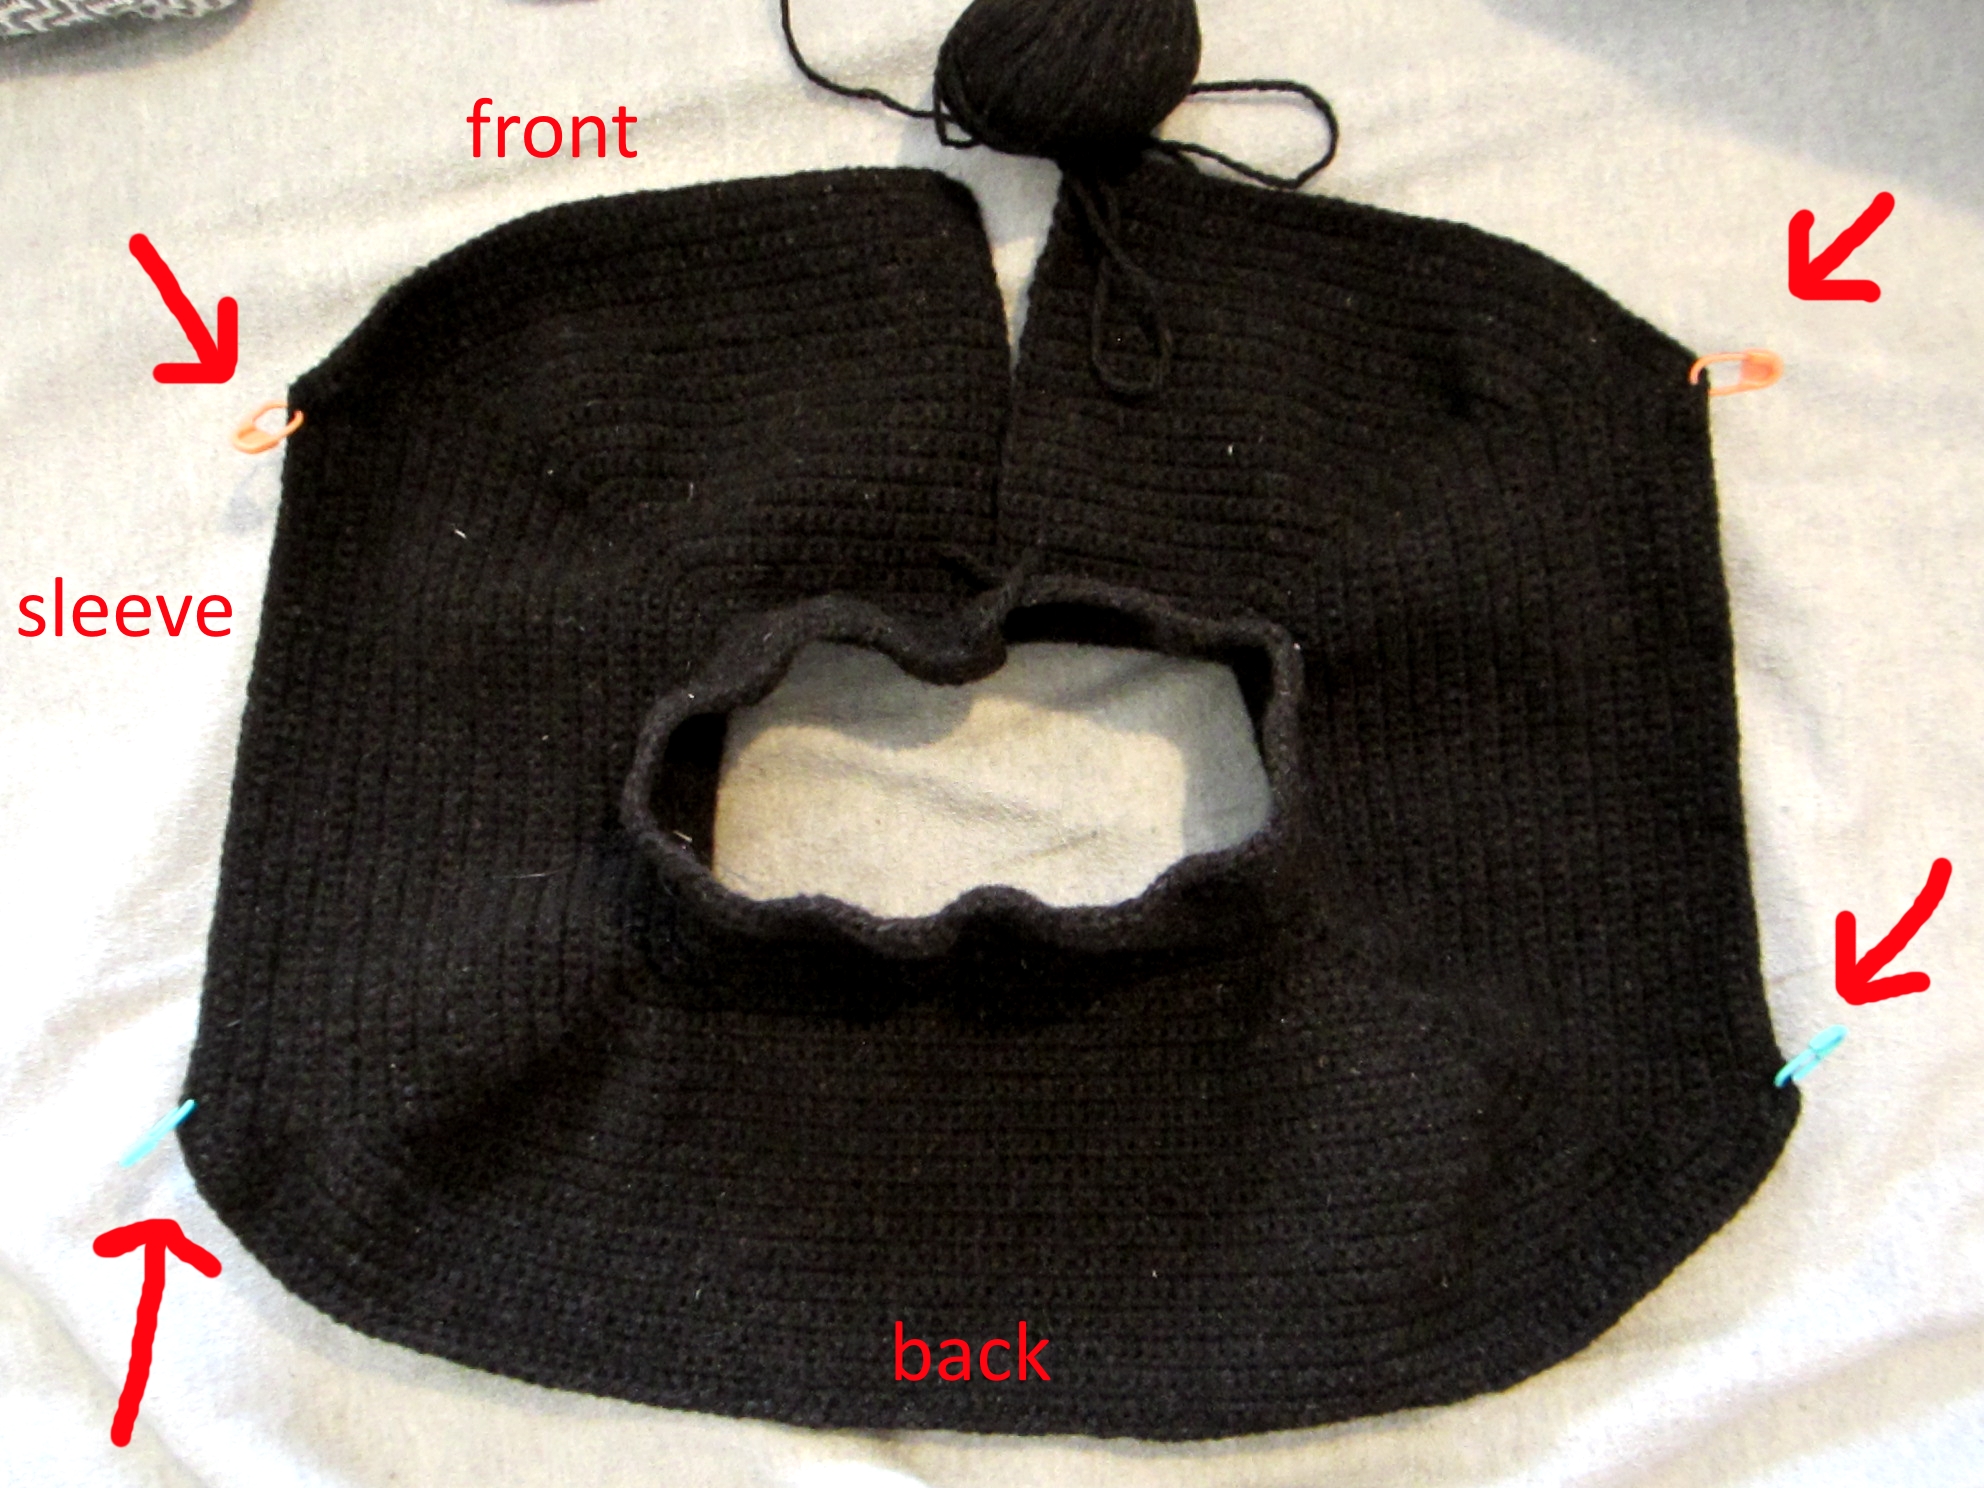
My rationale for where I put my stitch markers and where I increased.
But what will happen when I need to stop increasing the sleeves? I know that the straight line on the front and back that marks the sleeves will start to curve.
What if I wanted to make even increases throughout the shaping? Readers, do any of you know how to determine the number of increases I would need per the number of rows? Is there a formula I could use for future reference that helps me determine this?
That’s all for now. I’ve already shaped the sleeve holes and have about 4″ done post-sleeves. The next post will be about what I’m not liking so far.
Until next time, and thanks for reading!

Your project already looks amazing. It’s bold to go patternless, but the flexibility is one of the best things about crochet.
Here’s how I would figure out the decreases:
1. calculate gauge for 10cm by 10cm (about 4 inches square)
2. calculate how many rows it will take to reach desired length
3. calculate how many stitches wide your starting and finishing rows will be (upper arm and wrist, I’m assuming?). subtract the smaller number from the larger to find how many stitches will need to be decreased.
3. divide the number of rows to get length by the number of sts to decrease. you would decrease on the first of this many rows. if you want paired decreases, just double the number of rows between decreases.
Example: I want my sleeve to be 60 rows long. The top of the sleeve is 50 sts wide, and I want it to be 30 sts wide at the wrist. 50-30=20 stitches to decrease. 20/60 rows= 1 decrease/ 3 rows. I’d decrease on the first of that many rows. For paired decreases, I would decrease at the beginning and end of the first of every six rows.
Sorry if this is confusing or not what you needed. Good luck with the jacket!
Kate
LikeLiked by 2 people
Kate, this is perfect! Your explanation is also so much easier than the gobblygook in my head.
I also think that I’ll keep this in mind when doing my initial raglan shaping with increases for future projects.
Thank you!
LikeLike